What is an e-bike conversion kit
Key components and how they fit together – Overview of hub motors, mid-drive motors, batteries, controllers, and display units with basic integration tips for electric bicycle conversion kits.
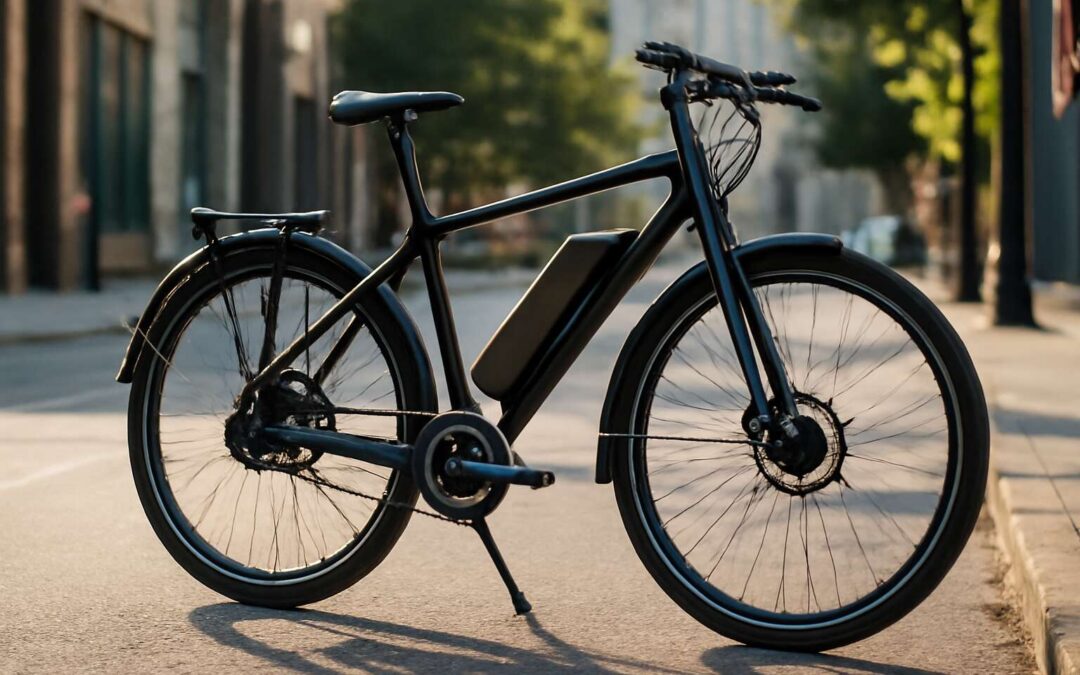
Torque-fueled freedom on two wheels is real—electric bicycle conversion kits turn a plain bike into a silent, punchy commuter. Across SA streets, that upgrade feels like a wink from the future.
Core components fit together like a well-tuned rig: hub motors or mid-drive motors, a suitable battery, a compact controller, and a display unit.
- Hub motors: wheel-mounted simplicity and easy swaps.
- Mid-drive motors: torque on demand and hills conquered.
- Batteries: matching voltage and capacity for your riding style.
- Controllers and displays: manage power and show speed, range, and assist level.
Display units provide live feedback, while tidy wiring and weatherproofing keep everything singing through the potholes and heat of SA roads.
Choosing the right electric bicycle conversion kits matters for SA riders, avoiding the cringe of a mismatched remnant on your bike.
Types of motor systems: hub vs mid-drive – Compare hub and mid-drive configurations, pros and cons for different riding styles in the context of electric bicycle conversion kits.
Torque-fueled freedom on two wheels reshapes daily commutes. A rider once said, “Torque is freedom on two wheels.” Electric bicycle conversion kits turn a plain bike into a silent, punchy partner on South African streets, offering practical lift for urban trips and weekend rides. They let you preserve your bike’s persona while adding assist, turning familiar routes into something almost cinematic.
Types of motor systems—hub versus mid-drive—shape how you approach hills, accelerations, and daily use in the context of electric bicycle conversion kits. Here’s the gist:
- Hub motors: simple, affordable, low maintenance; best for flat routes with limited hill torque.
- Mid-drive motors: strong torque, efficient gearing for hills and longer rides; higher cost and more wear.
For SA riders, the choice hinges on cadence and terrain—city commutes, coastal flats, or rugged climbs—making hub or mid-drive suit different routes.
Choosing power units: wattage and torque explained – Explain how watts, torque, and voltage affect performance and range in electric bicycle conversion kits.
In a country of sunlit coastlines and hills, torque becomes poetry on two wheels. A rider once proclaimed, “Torque is freedom on two wheels,” and electric bicycle conversion kits turn a humble bike into a silent, punchy companion for South African streets. They unlock the potential of these upgrades to reinvent everyday rides!
What is it? A kit adds a motor, battery, and controller to your frame, turning pedaling into momentum. When choosing power units, watts, torque, and voltage shape performance: watts spark bursts, torque conquers hills, and voltage sustains range.
- Watts govern immediate acceleration and nominal top speed.
- Torque defines hill-climbing prowess and low-speed response.
- Voltage influences sustained performance and overall range.
Throttle vs pedal-assist explanations – Describe throttle-only, pedal-assist, and combined modes and typical use cases for electric bicycle conversion kits.
Across South Africa’s sunlit coastlines and hills, power on two wheels rewrites the rhythm of a daily ride. A growing reality is that electric bicycle conversion kits are turning ordinary bikes into nimble, silent partners on South African streets. What is an e-bike conversion kit? It is a modular trio—a motor, a battery, a controller—that pairs with your frame to translate pedal effort into momentum.
Throttle vs pedal-assist matters. In practice, three modes frame the experience:
- Throttle-only: power on demand with a twist of the wrist, great for flat commutes or quick surges.
- Pedal-assist: sensors read your cadence and apply help, delivering a natural, intuitive ride.
- Combined modes: switch between both as needed—efficient for hills, loaded bikes, and variable terrain.
For enthusiasts, electric bicycle conversion kits unlock a personal, affordable entry to alternative transport. These configurations show how riders navigate South African streets, turning climbs into a conversation with the road and daily trips into small adventures.
Choosing the right kit and power levels
Assessing bike compatibility and frame considerations – Check available space, brake compatibility, derailleur clearance, and mounting points for your specific bike when selecting an electric bicycle conversion kit.
Choosing the right kit hinges on fit as much as power. Frame geometry, wheel size, and dropout spacing limit which electric bicycle conversion kits will perform safely and reliably. In South Africa’s mixed-terrain city rides, a compact setup keeps weight in check and handling predictable. That matters!
Power levels must align with your riding goals and the local terrain. Assessing compatibility means looking beyond motor type to the frame and components, from available mounting points to potential derailleur interference.
- Available space on frame and dropout alignment
- Brake compatibility (rim vs disc, mechanical vs hydraulic)
- Derailleur clearance and chainline
- Mounting points for motor, battery, controller, and display
A compatible setup respects your bike’s geometry and keeps service space for maintenance.
Motor power, battery capacity, and range planning – Discuss typical watt ranges (250W, 500W, 750W), battery amp-hours, and real-world range estimates to fit your needs in electric bicycle conversion kits.
Choosing the right kit is more about fit than horsepower. For South Africa’s mixed terrain, a balanced 250W–500W setup paired with a 10–14Ah battery often feels sprightly and controllable. Power is important, but so is range, weight, and how the bike handles the load. When selecting electric bicycle conversion kits, match motor class to your daily routes and hills, not just top speed.
- 250W: ideal for flat commutes and stealth operation
- 500W: solid support for moderate hills and city rides
- 750W: maximum boost for steep climbs or heavier riders—check local regulations
Battery capacity dictates real-world range. A 36V pack in the 10–14Ah bracket yields roughly 360–504Wh; with pedal assist, expect 40–80 km on mixed city routes. Bigger Ah increases range but adds weight. Pick a pack that aligns with how far you ride and how much you’re willing to spend to keep these electric bicycle conversion kits humming.
Budget ranges and value picks for different riders – Offer price tiers, from entry-level to premium kits, with feature highlights and perceived value for electric bicycle conversion kits.
Rural roads and city hills teach a simple truth: the right kit is a perfect fit, not a chase for more horsepower. Across South Africa, riders tell me that reliability, range, and handling matter far more than top speed. As one farmer-turned-rider put it, “Reliability beats horsepower.” With electric bicycle conversion kits, you tailor momentum to your daily routes and keep the ride joyful on every rough patch.
Budget ranges below, from entry to premium, capture values that fit different lives:
- Entry-level: Under roughly R3,000–R6,000. 250W, pedal assist, basic display; ideal for flat commutes.
- Mid-range: R6,000–R12,000. 350–500W, smoother assist, better displays.
- Premium: R12,000+. 750W options, advanced displays, robust hardware for hills.
These tiers reflect not just power, but weight, ride feel, and long-term maintenance—key for communities across SA who depend on dependable, affordable mobility.
Installation and setup guide
Tools, safety gear, and prep steps – List essential tools, safety precautions, and workspace setup for installing an electric bicycle conversion kit.
Adventure-friendly engineering begins in a tidy, bright workspace. When it comes to electric bicycle conversion kits, clarity is safety: layout your tools, protect your eyes, and plan cable routes like a route map across South Africa’s streets.
- Hex key set and torque wrench
- Screwdrivers (flat and Phillips)
- Wire cutters/strippers
- Electrical tape and zip ties
- Bike stand
Ensure a dry, well-lit workspace with ventilation. Mount the bike securely, clear away clutter, and keep batteries from heat sources. Move with calm, deliberate care; avoid loose clothing near moving parts.
Mounting the motor and battery safely – Step-by-step mounting guidelines for front hub, rear hub, or mid-drive, including torque specs and safety notes for electric bicycle conversion kits.
Mounting a motor should feel like precise engineering, not a pub-table experiment. For front hub, rear hub, or mid-drive, clarity is safety: align components, keep cables tidy, and torque fasteners to the manufacturer’s specs. For electric bicycle conversion kits, a tidy setup matters. Safety notes: batteries away from heat sources, eye protection, and no loose clothing near moving parts.
- Front hub: confirm wheel compatibility, rotor alignment, and torque to spec; avoid brake interference.
- Rear hub: check chainline, spoke tension, and clearance for the cassette or derailleur, if present.
- Mid-drive: ensure bottom bracket compatibility, chainring clearance, and neat cable routing to prevent snags.
Once mounted, inspect fasteners, route cables away from heat sources and moving parts, and perform a cautious wobble test before any road testing. In South Africa, these electric bicycle conversion kits are built to endure heat and hills, so a tidy, robust installation helps them flourish.
Wiring harness, connectors, and controller setup – Guidance on routing wires, connector checks, and controller configuration during installation.
Hardware chatter fades when the wiring sings in quiet harmony. For electric bicycle conversion kits, the wiring harness is not ornament; it’s the nervous system. Route cables along frame contours, hide conduits under seals, and keep connectors clean and dry—no soggy plugs, no chaos under the sun of South Africa’s heat. Heat management begins with tidy routing and a respectful respect for the controller.
- Wiring harness routing should follow frame contours, staying clear of heat sources and moving parts.
- Connector checks focus on secure fits, corrosion-free contacts, and weather sealing to resist dust and moisture.
- Controller configuration should harmonize with the motor, matching pedal-assist behavior to reading displays and power delivery.
Finally, double-check the harness for sharp bends, test clearances, and perform a cautious wobble before road testing. With electric bicycle conversion kits, a tidy harness translates to dependable performance.
Programming, calibration, and ride modes – Explain how to calibrate speed sensors, torque sensors, and set pedal-assist levels for optimal performance in electric bicycle conversion kits.
South Africa’s urban sprawl is matched by a surge in pedal-powered freedom, with mobility data showing a double-digit uptick in pedal-assisted trips across metros last year, (electric bicycle conversion kits) sit at the heart of that shift! The most crucial phase isn’t the hardware—it’s programming, calibration, and ride modes that translate heat, hills, and hurry into a predictable ride. The right setup turns a kit into a quiet companion, rather than a rattling afterthought on a dusty suburb road.
Speed sensors, torque sensors, and pedal-assist levels form a triad of harmony. Calibrating the speed sensor ensures the motor responds to wheel movement with discipline; tuning the torque sensor shapes how hard you push before the motor joins the dance; selecting pedal-assist levels ties power to terrain, rider weight, and energy reserves. I see calibration as a rhythm you can trust—an interface that speaks your intent and the road’s language.
Initial test ride checks and troubleshooting basics – Checklist before first ride and common issues with quick fixes during the setup of electric bicycle conversion kits.
Installation and setup for electric bicycle conversion kits is where quiet intention meets the roar of the road. In South Africa’s sunlit streets, the preparation is a ritual as much as a task: a moment to listen to the chassis and the hush of electronics, to align expectations with reality. A pre-ride check becomes a lyric of readiness, a promise kept.
- Mounting alignment and frame clearance
- Clean wiring and secure connectors
- Brake and sensor compatibility checks
On the inaugural glide, observe how pedal assist and throttle whisper in sync; notice any lag, noise, or hesitation as the road is met. Quick fixes—gently adjusting a loose connector, re-seating a cable, or rechecking sensor alignment—are refinements rather than upheaval. electric bicycle conversion kits become reliable partners on SA’s varied terrains.
Maintenance, safety, and compliance
Routine maintenance tips for longevity – Battery care, motor inspections, brake checks, and cleaning guidelines to keep your electric bicycle conversion kit in top condition.
Riders know maintenance is the quiet engine behind every journey. As a veteran bushveld rider once quipped, ‘maintenance is the magic that keeps the road singing.’ Regular care extends life, boosts safety, and preserves the soul of your ride—especially with electric bicycle conversion kits. Focus on battery care, motor inspections, brake checks, and cleaning to keep performance peak.
Simple routines, done with care, pay dividends on the road. Consider this quick checklist:
- Battery care: store at partial charge, avoid extreme temperatures.
- Motor inspections: listen for grinding, check mounting torque.
- Brake checks: inspect pads and rotor wear, ensure responsive braking.
- Cleaning guidelines: wipe with a damp cloth, avoid high-pressure streams.
For safety and compliance, route wires securely, wear protective gear, and stay aligned with local regulations. In South Africa, verify your kit meets road-use standards and remember: a well-tuned system respects rider and surroundings.
Riding safety, etiquette, and best practices – Helmet usage, PPE, lighting, and safe acceleration/deceleration habits for riders using conversion kits.
“Safety is the quiet engine behind every ride,” a veteran bushveld rider once said. On South African roads, maintenance, safety, and compliance form a single circuit around electric bicycle conversion kits, keeping you visible, alert, and in control as night swallows the street, a guardian whisper guiding your pace.
Riding safety, etiquette, and best practices shape a rider’s rhythm on electric bicycle conversion kits. Helmet usage, PPE, lighting, and safe acceleration/deceleration habits keep you predictable and seen.
- Helmet usage
- PPE and high-visibility gear
- Lighting and reflectors
- Predictable acceleration and braking
For safety and compliance, route wires securely, and stay aligned with local regulations. In South Africa, verify your electric bicycle conversion kits meet road-use standards and remember that a well-tuned system respects rider and surroundings.
Legal requirements, local regulations, and classifications – Understand classification, speed limits, insurance implications, and where to check rules for electric bicycle conversion kits.
“Legal clarity is the quiet engine behind every ride,” says a veteran bushveld rider. On South African roads, power and responsibility around electric bicycle conversion kits shape every kilometre you ride.
Classification, speed limits, and insurance implications aren’t mere footnotes; they determine where these electric bicycle conversion kits may roam on public streets. Local regulations shift by province and municipality, so consult official sources to stay aligned with the law and your insurer.
To untangle the rules, turn to trusted references and the ecosystem of guidelines surrounding electric bicycle conversion kits.
- National road traffic regulations and official government portals
- Provincial and municipal by-laws
- Insurance policy terms and coverage implications
- Manufacturer documentation and installation guidelines