
Understanding E-Bike Conversion Kits
What Is a Conversion Kit and How Does It Work
Nearly 70% of South African commuters live within 10 kilometers of work. That is an easy distance for a motorized bike! Yet most people buy a new e-bike when a conversion kit costs far less. I have seen kits transform ordinary bicycles into dependable daily vehicles.
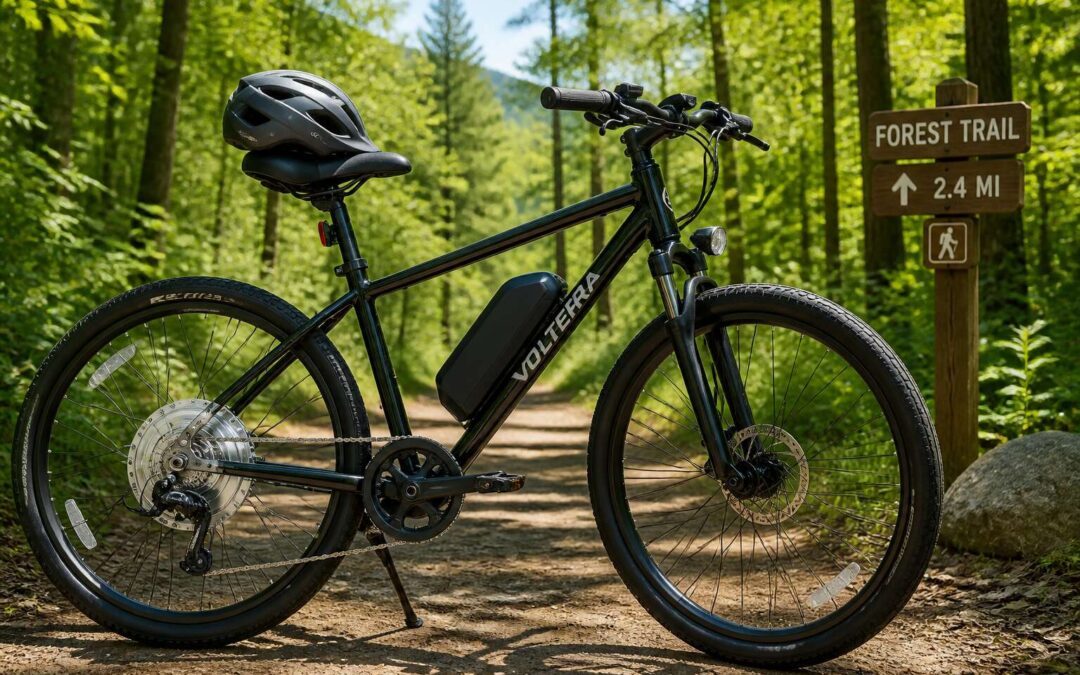
A conversion kit replaces the human-only drivetrain with an electric assist system. The electric bicycle motor kit with battery includes a motor, a controller, a throttle, and a rechargeable pack. The motor mounts on the front or rear wheel, or in the bottom bracket. When you pedal, sensors detect your motion and activate the motor. The battery feeds the controller, which regulates power delivery.
- Hub motors sit inside the wheel, making them easy to fit and maintain.
- Mid-drive motors connect to the crank, using your gears for better torque.
Installation takes two to four hours with basic tools. You keep your frame, wheels, and brakes. The result is a quiet, capable electric bicycle for South African roads.
Top Benefits of Converting Your Existing Bicycle
The global bicycle fleet stands at roughly 1.2 billion, yet few ever receive electric traction. That quiet shift offers a smart financial decision. A new e-bike in South Africa often demands R25,000 or more. An electric bicycle motor kit with battery typically costs under R10,000. You keep your existing frame, saddle, and brake setup, which means no awkward geometry or wasted components.
Converting your bicycle also preserves your hard-won familiarity. Every shimmy of your handlebars, every worn grip, stays exactly as you like it. For commuters, this translates into speed without sacrificing the daily workout. You decide how much assistance the motor provides. The throttle works for hills, while pedal sensors engage only when you push.
- Retains original wheel size and gearing
- Requires no registration or licensing
- Allows incremental upgrades, such as higher capacity packs
I have watched riders rediscover their old mountain bikes after installing an electric bicycle motor kit with battery. The motor masks heavy winds and long climbs. Your bicycle becomes a versatile tool, ready for cargo runs or weekend trails, all without the depreciation of a brand new machine.
Checking Frame and Component Compatibility
Your frame hides secrets that determine whether a conversion succeeds. Dropout width, bottom bracket threading, and brake mounts speak a specific language. An electric bicycle motor kit with battery will only obey if these align perfectly. Most older mountain bikes accommodate hub motors, but road bikes often need adapters.
- Dropout spacing
- Bottom bracket standard
- Brake type and cable routing
Component compatibility extends beyond the motor. I always check spoke count and cassette fit before recommending any purchase. A mismatch here means wasted weekends and extra expenses.
Budgeting for a Quality Kit and Battery
In South Africa, the rand’s volatility makes the price of an electric bicycle motor kit with battery a moving target. A quote today may shift by next week. I have seen riders choose the lowest priced conversion, only to replace the battery within months. Battery chemistry and controller quality determine longevity, and neither appears in a product photo.
When budgeting, consider the full system:
– Cells from known manufacturers like LG, Samsung, or Panasonic
– A controller with low voltage cutoff
– Torque arms for hub motors
These details separate a daily commuter from a weekend ornament. A quality electric bicycle motor kit with battery costs more upfront but carries you thousands of kilometres without drama. Protect your investment by allocating at least a third of your budget to the battery alone.
Realistic Speed and Range Expectations
Most riders overestimate range by a third. Realistic speed and range expectations begin with physics, not marketing. A 250 W electric bicycle motor kit with battery on a flat, windless road reaches 32 km/h. Add a headwind, a slight incline, or a heavier rider, and that number drops sharply. South African conditions, from Cape Town’s hills to Johannesburg’s altitude, demand honest assessment.
Range follows the same logic. The battery’s watt hour rating offers a theoretical maximum, but your pedalling style, tyres, and stop start traffic all subtract from it. Expect 40 to 60 km of steady assistance under normal commuting, and half that when pushing hard uphill. Choose your system based on the worst day you will actually ride, not the best.
Motor Types Explained
Hub Motors Versus Mid-Drive Motors
Choosing between a hub motor and a mid-drive motor involves real trade-offs, and only one will climb South African hills with grace. Hub motors live inside the wheel, offering simplicity and quiet operation. Mid-drive motors sit near your pedals and use your bike’s gears for torque. For an electric bicycle motor kit with battery, this decision shapes your entire ride.
Consider the terrain. I have watched hub motors wheeze on Cape Town’s climbs. Hub motors suit flat commutes. Mid-drive motors handle steep passes because they exploit the drivetrain.
The trade-offs:
- Hub motors cost less and need less maintenance.
- Mid-drive motors wear chains faster yet deliver better range.
Most Gauteng commuters choose hubs for flat routes, while Cape Town riders prefer mid-drive units for the mountain passes.
Front Hub vs Rear Hub Placement Trade-Offs
Front motors and rear motors respond differently to the same tar. I have watched riders fit an electric bicycle motor kit with battery and then wrestle the handlebars on loose stones near Chapman’s Peak. Front hubs pull the bicycle forward, which leaves the drivetrain untouched and makes wheel removal simple. Rear hubs push from behind, pressing weight onto the tyre for better grip on climbs.
The placement trade-offs:
- Front hubs suit flat commutes but can skid on sandy shoulders
- Rear hubs climb with confidence yet complicate puncture repairs
Most South African riders I meet prefer the rear for the Western Cape’s gradients and the front for Gauteng’s level streets.
Power Ratings, Torque, and Hill-Climbing Ability
Most South African riders discover that a motor’s wattage is the main specification, while torque is the detail that determines performance. A 250W electric bicycle motor kit with battery might handle Durban’s flat esplanade, but it will labour on any serious climb. Torque, measured in Newton meters, indicates how forcefully the motor pushes you upward.
- 250W: legal on public roads, gentle on battery, weak on hills
- 500W: balanced for daily commuting and moderate gradients
- 750W and above: for relentless inclines or carrying cargo
For the Western Cape’s passes, aim for at least 45Nm. That combination of watts and twist separates a pleasant ride from a long push home.
Cadence Sensors vs Torque Sensors for Pedal Assist
Every electric bicycle motor kit with battery depends on a sensor to interpret your pedaling. The two dominant types are cadence sensors and torque sensors, and they produce different riding experiences.
Cadence sensors detect pedal rotation only. They switch the motor on at a fixed level, often producing a sudden surge. This works on Durban’s flat esplanade but feels clumsy on a gravel path. These systems cost less but drain the battery faster.
- Cadence sensor: detects rotation, simple, affordable
- Torque sensor: measures force, refined, pricier
Torque sensors measure how hard you push. The motor mirrors your effort, so gentle pedaling yields gentle assistance. The response feels immediate and connected. I have tested both, and the difference is stark. For Cape Town’s stop-start traffic, this control is essential.
Your choice of sensor defines the character of the electric bicycle motor kit with battery you install.
Regenerative Braking: Is It Worth It
Most e-bike riders lose 10% of their range to braking waste. An electric bicycle motor kit with battery that includes regenerative braking reclaims some of that energy, but only if you choose a direct drive hub motor. Geared hub motors cannot regen. This distinction matters more than advertised wattage.
Regenerative braking works by reversing the motor into a generator. The resistance it creates slows you down while feeding current back to the battery. I tested a kit on Kloof Nek Road! The descent returned 8% of my charge. On flat Johannesburg routes, that number dropped to zero.
- Long descents: noticeable gains
- Stop and go traffic: marginal gains
- High cost: typically R2000 extra
For most riders, an electric bicycle motor kit with battery that skips regen saves money and weight. A lighter battery gives you more range than a heavier regen system. Only invest if your daily route includes sustained hills.
Selecting the Right Battery
Understanding Voltage and Amp-Hour Ratings
In battery selection, the numbers that matter are voltage and amp hours, yet most riders misread their relationship. Voltage determines the ceiling of the motor’s effort, while amp hours decide how long that effort lasts. On a South African commute, with relentless hills and stop-start traffic, getting this wrong makes every ride a struggle.
There is something psychological at play here. Riders fear running out of power more than they fear overpaying, so they buy the biggest pack they can find. I have watched friends ignore the controller’s voltage limit and pay the price with burnt components! The truth is that an electric bicycle motor kit with battery should be chosen for the route you actually ride, not the one you imagine. That means reading the spec sheets carefully and respecting the limits of the system you already own.
Lithium-Ion, LiFePO4, and Other Battery Chemistries
Most riders obsess over capacity, yet the chemistry inside the pack determines its true character. Lithium-Ion remains the safest default for an electric bicycle motor kit with battery due to its energy density and mature manufacturing standards. Nickel Manganese Cobalt cells, typically abbreviated as NMC, offer a solid balance of weight and cycle life for daily commuting. Lithium Iron Phosphate, or LiFePO4, presents a heavier alternative with a lower energy density, but it compensates with exceptional thermal stability and a lifespan that can stretch past two thousand charge cycles. For South African conditions, especially the highveld summer heat, that resilience is a tangible advantage. The controller and charger must match the chemistry precisely. A mismatched charge profile can turn a reliable pack into a fire hazard.
The market also offers Lithium Polymer cells, which wrap their electrolyte in a soft pouch. These packs allow for creative frame mounting, yet they demand careful mechanical protection. A minor puncture reduces them to scrap. When you compare chemistries, your decision comes down to a few factors:
– Weight tolerance for the bike frame
– Ambient temperature exposure during storage
– Expected daily distance and charge frequency
– Budget allocation for the battery versus the motor
Newer formulations, such as Lithium Titanate, boast rapid charging and remarkable cold tolerance, but their low voltage plateau often requires a custom controller. The practical takeaway is straightforward. Choose a battery chemistry that aligns with your charging habits and your willingness to perform maintenance. The cheapest pack rarely delivers the lowest cost per kilometre. A durable LiFePO4 unit might cost more upfront, but it will outlast two standard Lithium-Ion packs in daily use. Prioritize a battery with a built-in Battery Management System that balances individual cells. This component protects your investment, particularly when you pair it with a torque sensor that draws variable current on long climbs. Your electric bicycle motor kit with battery performance depends on this synergy.
Estimating Range Based on Capacity and Riding Style
Most South African commuters ride under 15 kilometres per day, yet many buy batteries built for marathon trips. Range estimation comes down to watt-hours, rider weight, terrain, and assist level!
For an electric bicycle motor kit with battery, capacity alone doesn’t tell the story. A 48V 15Ah pack holds 720 watt-hours. A light rider on flat roads, using eco mode, might cover 60 kilometres. A heavier rider on Johannesburg hills with the throttle could see that fall to 30.
Riding style changes everything. Aggressive acceleration and stop-start traffic drain cells faster than steady cadence. When sizing your pack:
- Higher assist cuts range by up to 40 percent
- Headwinds and cargo add resistance
- Low tyre pressure eats capacity silently
Match the battery to your actual route, not a brochure promise.
Charging Best Practices to Extend Battery Life
One rule governs battery longevity: heat is the enemy. A 48V pack charged in a Gauteng garage during summer will age faster than the same pack charged in the evening cool. For an electric bicycle motor kit with battery, the charging routine matters as much as the hardware.
Most riders assume a full charge is always ideal, but lithium cells prefer a partial top-up. Charging to 80 percent for daily commutes and reserving 100 percent for long trips extends cycle count.
- Let the battery cool for 30 minutes before plugging in
- Unplug at 80 percent for daily rides
- Store at 50 percent if you skip a week
A cheap universal charger can push inconsistent voltage and shorten cell life, so always pair your electric bicycle motor kit with battery to the original unit. Charging below 10 degrees Celsius also causes lithium plating, which permanently reduces capacity. Charge indoors, but never on a flammable surface.
The Role of a Battery Management System
Selecting the right battery for your electric bicycle motor kit with battery is a decision that quietly determines every ride. I have seen riders focus only on capacity, yet the battery management system, or BMS, is the critical component of the pack. This small circuit board balances cell voltages, prevents overdischarge, and cuts power during thermal stress. Without a reliable BMS, even a premium lithium cell can fail within months!
A BMS typically manages these functions:
- Continuous discharge rating matched to the controller
- Low temperature cutoff for cold morning starts
- Cell balancing current above 50 milliamps
A poorly configured BMS shortens lifespan faster than any charger. The right battery includes a BMS that communicates faults clearly, avoiding the silent degradation that catches many commuters off guard.
Mounting Options: Rack, Frame, or Integrated
Mounting the battery is a decision that changes how your electric bicycle motor kit with battery behaves. A rack battery sits low behind the rear axle, which can make the bike feel sluggish on loose gravel. Frame batteries keep the mass centered, improving balance on steep climbs. Integrated batteries hide inside the frame, offering a clean look but limiting access for repairs.
In South Africa, road conditions vary from smooth tar to corrugated dirt. Rack mounts are simpler to install and allow quick removal for charging. Frame mounts protect the cells from vibration but reduce bottle cage space. Integrated options suit riders who value aesthetics over serviceability.
- Rack: easy access, higher center of gravity
- Frame: balanced handling, secure placement
- Integrated: sleek design, harder to maintain
Installation Process and Tips
Essential Tools and Workspace Setup
Installing a conversion kit rewards patience and order. Begin by clearing a flat, well-lit space in your garage or under a carport. Lay out all parts on a drop cloth so nothing rolls away mid-task. You will need metric sockets, a torque wrench, tyre levers, and a chain breaker.
A workstand is a worthwhile luxury. It holds the frame steady while you fit the motor wheel and align brake rotors. Then address the battery. Mount its bracket firmly to the rack or downtube, using thread-locker on every bolt. A loose battery compromises handling and invites electrical faults.
When you install an electric bicycle motor kit with battery, cable routing decides whether the machine looks factory-built or thrown together. Run the wiring along the existing brake lines, securing it with spiral wrap and zip ties every ten centimetres. Leave slack near the handlebars so steering stays fluid. Each connector clicks home, and the first quiet rotation of the wheel under pedal assist feels earned.
Removing Your Existing Wheel and Bottom Bracket
The old rear wheel leaves the frame with a quiet protest. Release the brake caliper first, then shift the derailleur to its smallest cog. The axle slides free only when the quick release loosens fully. For a mid-drive conversion, the bottom bracket demands more ceremony. A crank puller extracts each arm, and the cartridge bearing unit spins out counterclockwise. This moment teaches patience.
Before your electric bicycle motor kit with battery arrives, measure the shell width. Check the facing for burrs, and clean the threads. Brake rotors need centring after the new wheel sits.
- Support the frame on a workstand
- Keep all spacers and washers labelled
- Torque the crank bolts to spec
Your hands know the ritual. The motor wheel slots into the dropouts, and the bottom bracket accepts its new occupant. That electric bicycle motor kit with battery now waits for its first pulse of current.
Mounting the Motor Securely to the Frame
Torque specifications are not suggestions! A motor mount that shifts under load will wear its bolt holes elliptical and invite a wobble that no wheel truing can fix. The bolts holding your electric bicycle motor kit with battery to the frame deserve the same reverence as the crank arms you just removed. Work in a cross pattern, snug each fastener gradually, and let the torque wrench speak last. A thread locker prevents vibration from loosening what you have carefully set.
The motor should sit square to the frame, its mounting plate flush against the bracket. Misalignment creates stress on the drivetrain and dulls the responsiveness of your pedal assist. Weight distribution matters too. A rear electric bicycle motor kit with battery shifts the centre of gravity, changing how the bike tracks over uneven tar. Creaks on the first ride are a direct signal. A bolt that needs another quarter turn makes its presence known immediately.
Connecting Controller, Display, and Throttle
Connecting the controller separates careful builds from constant troubleshooting. Verify the controller’s labels against your motor’s phase wires before plugging anything in. A mismatched connection can produce a stuttering wheel or, worse, a burned-out hall sensor. Most controllers use colour-coded wires, but do not rely on that alone. Trace each connector and match it to the display and throttle ports.
The display manages the electric bicycle motor kit with battery’s power output. Mount it where you can read it without dropping your gaze from the road. The throttle sits within easy thumb reach. A cable too tight pulls at the connector over time. A cable too loose rubs against the tyre.
Follow this order:
- Connect the battery leads to the controller first.
- Attach the display and throttle cables.
- Tape off unused connectors to keep grime out.
- Test the system with the wheel off the ground.
This sequence prevents a dangerous startup surge.
Initial Testing and Safety Checks Before Riding
With the wheel mounted and the axle torque checked, the installation process moves into verification. Spin the wheel by hand to confirm the rotor clears the brake pads and the tyre does not rub. On an electric bicycle motor kit with battery, a gentle spin often reveals a misaligned dropout or pinched cable.
Initial testing requires the wheel off the ground. Turn the display on and note the voltage. Apply throttle slowly and listen for an even hum. Test each brake lever to confirm it cuts motor power instantly. Inspect the throttle return spring for sticking. For any electric bicycle motor kit with battery, this check prevents a serious accident.
Before riding, run through these safety checks:
- Confirm the battery lock engages fully.
- Check axle nuts with a wrench.
- Do a walk test with motor off.
Long-Term Care and Legal Aspects
Routine Maintenance for Motor and Battery
Owning an electric bicycle motor kit with battery carries long term obligations that many riders overlook. Legal requirements in South Africa may classify your machine as a motor vehicle if power output exceeds local limits. Verify your setup before assuming it is road legal. Routine maintenance protects both your warranty and your safety. Consider a few checks each month:
- Inspect wiring for chafing where it passes through the frame.
- Clean battery contacts with a dry cloth.
- Torque the motor mounting bolts to spec.
Coastal riders should watch for corrosion on connectors. A simple habit of visual inspection before each ride prevents costly failures. Store the battery at moderate temperature, not full charge, when idle for weeks. Neglect shortens lifespan and invites legal trouble if a failure causes an accident.
Troubleshooting Common Electrical and Mechanical Issues
Half the calls about an electric bicycle motor kit with battery involve a loose connection. The other half involve a rider who just discovered their machine is legally a motorcycle. Neither ends well.
Troubleshooting starts with controller error codes. Grinding from the hub usually means planetary gears are shedding teeth, a fixable issue if caught early. Power cuts on hot afternoons point to a thermal cutoff.
- Test the throttle with a multimeter
- Swap the display to check the wiring harness
Legal aspects hinge on power output. Provincial rules differ, but a 500W electric bicycle motor kit with battery often triggers licence and registration requirements. The fine for noncompliance is steep. Ignorance does not impress a magistrate.
Essential Safety Gear for E-Bike Riders
South African tar softens under the January sun, yet helmet standards assume a cooler climate. Riders who fit an electric bicycle motor kit with battery must treat safety gear as a living system, not a static checklist. Provincial laws demand a certified helmet, rear reflector, and a bell. Some municipalities require additional lighting. The consequences of noncompliance reach beyond fines.
- Helmet with a visible SABS mark
- Front lamp and rear lamp in working order
- Reflective vest for dusk commutes
- Gloves with reinforced palms
Care for this equipment with the same discipline you apply to the battery. Sunlight degrades nylon straps, and sweat corrodes buckles. Wash the helmet lining monthly and inspect the shell for hairline cracks. An electric bicycle motor kit with battery performs reliably for years, but a neglected visor fails without warning. Replace any compromised piece immediately, because the road reads your luck as a statistic.
Local E-Bike Classification and Licensing Rules
The heat does not care how well you bolted down your conversion. Long-term care of an electric bicycle motor kit with battery extends beyond mechanics into the letter of the law. The National Road Traffic Act draws a hard boundary at 250 watts and 25 kilometres per hour. Cross that threshold and your machine becomes a motorcycle for licensing purposes. Your driver’s license may not cover it. Municipal by-laws complicate matters further. Some districts require electric bicycles to follow scooter lanes. Others demand a licence disc displayed on the frame. These rules mutate from ward to ward.
- Pedal-assist under 250W: treated as a bicycle
- Throttle or high-power assist: classified as a motor vehicle
- Retrofit with modified firmware: automatically reclassified
Enforcement officers have read the regulations, and they will measure your output before they listen to your story.
Warranty Coverage and Where to Find Support
Warranty coverage for an electric bicycle motor kit with battery is not automatic. Most manufacturers distinguish between the motor unit and the lithium cell pack, each with separate claim windows. If you modified the firmware to exceed 250W, that voids the warranty immediately! Keep the original receipt, serial numbers, and a dated photo of the installation.
Legal support matters when an accident happens. Insurance companies treat an over-wattage conversion as an unlicensed motorcycle. That means a rejected liability claim. Contact the cycle advocacy group in your province before you ride. They understand municipal by-laws and can direct you to certified technicians. Useful support routes include:
- The manufacturer’s local distributor
- An accredited e-bike workshop
- The National Regulator for Compulsory Specifications