
Getting Ready for Your Build
Choosing the Right Workspace
A cluttered garage floor is not a workshop. The space where you tackle electric bicycle assembly determines how smoothly the process goes. I learned this after wrestling with a wobbly card table and a dying flashlight.
Your workspace needs three essentials:
- A sturdy table at hip height
- Overhead lighting that reaches every corner of the frame
- Access to power outlets for a torque wrench
Even a modest corner of a spare room works! Keep it dry, since grease and moisture cause corrosion. A dedicated area lets you leave parts out between sessions. That convenience reduces the time needed for each session.
Essential Tools and Safety Gear
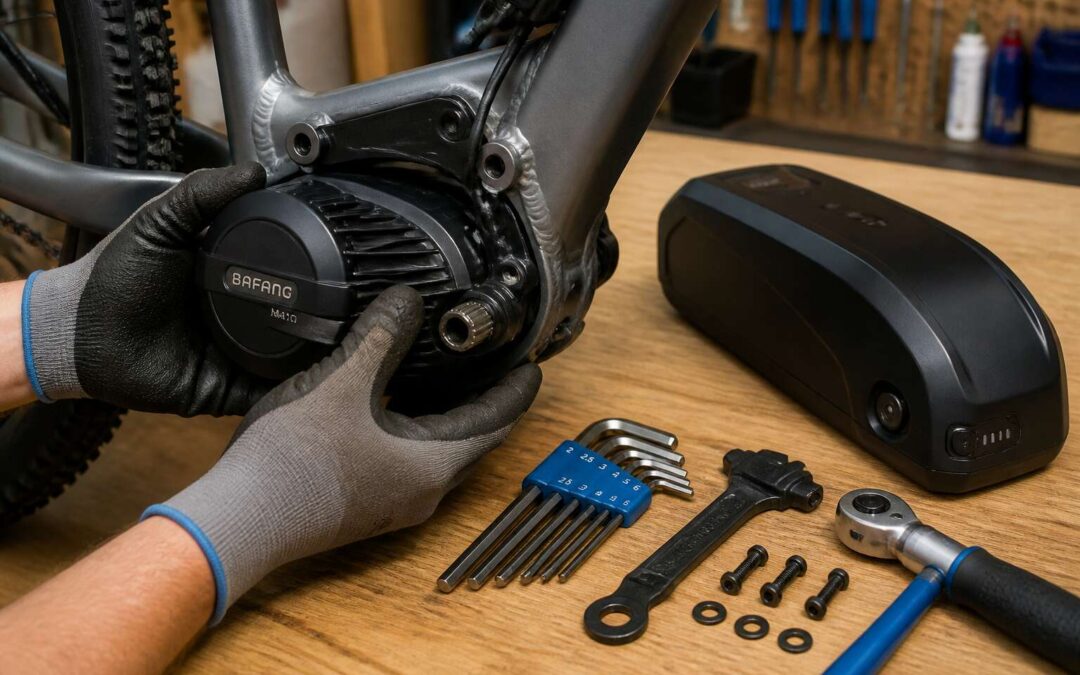
A single overlooked fastener can turn electric bicycle assembly into a two hour hunt for a dropped washer. I keep my tools within arm’s reach, arranged by size. The essentials include a calibrated torque wrench, which prevents overtightening carbon fiber components, and a set of hex keys with rounded ends for awkward angles.
Safety gear matters equally in electric bicycle assembly. A pair of nitrile gloves protects your hands from grease and sharp cable ends. Safety glasses shield your eyes from snapped spokes or spring-loaded derailleurs. For the electrical side, you need insulated pliers and a multimeter to verify connections. The list of must-haves:
- Torque wrench with a socket set
- Hex keys and screwdrivers
- Cable cutters and zip ties
- Gloves and safety glasses
These items live on the bench, not in a drawer. A missing tool can cause you to improvise with a hammer.
Unboxing and Inventorying Parts
The unboxing stage sets the tone for the entire electric bicycle assembly. A cardboard box arriving damaged already tells you something about the journey your frame endured. I photograph each layer before lifting it out. This habit has saved me countless headaches when a component later goes missing.
Inventorying demands structure. I sort every bracket, bolt, and spacer into labelled containers before touching the frame itself. The instruction manual becomes a checklist rather than a reference guide. During electric bicycle assembly, a missing battery cradle discovered midway interrupts your focus entirely.
Specific items I verify:
– Frame and fork for shipping damage
– Wheel set and disc rotors
– Display unit and wiring harness
– Charger and battery locking mechanism
Most suppliers pack components in nested layers. Remove each layer deliberately. Fasteners hidden in folded cardboard edges are a common oversight. The anticipation of riding can cloud your patience here. Slow down.
Assembling the Core Structure
Attaching the Front Fork and Handlebars
A torque wrench set to 20 Nm can make the difference between a safe build and a catastrophic failure. During electric bicycle assembly, the frame forms the core structure. When assembling the core structure, align the bottom bracket with the motor housing first. A misaligned drivetrain will cause issues in every subsequent step. I torque each bolt in a crisscross pattern to distribute stress evenly. Check the dropouts for square alignment before moving forward.
Attaching the front fork requires precision:
- Slide the steerer tube through the headset bearings without forcing it.
- Settle the crown race flush against the bearing seat.
- Install the handlebars and tighten the stem cap incrementally.
Every component connects to the next during electric bicycle assembly. Small errors compound, so proceed deliberately. The reward is a ride that feels solid and responsive.
Installing the Pedals and Crank Arms
With the front end locked in place, the drivetrain demands equal respect. The crank spindle passes through the bottom bracket shell and must rotate freely before assembly continues. Grease the threads, but avoid the taper interface. A torque wrench set to 48 Nm secures the crank arms to the spindle!
The pedals themselves trick many builders. The right pedal tightens clockwise, the left pedal counterclockwise. Forcing them the wrong way strips the alloy crank threads. I spin each pedal by hand to confirm engagement. A dry chainline run reveals whether the front chainring sits parallel to the cassette.
- Rotate the crank arms for smooth, silent arcs.
- Verify the pedal spindles spin freely in both directions.
- Confirm the chainring bolts are torqued to 15 Nm.
This stage of electric bicycle assembly defines rider safety. Every wobble in the crank multiplies at speed, so precision determines the entire electric bicycle assembly’s reliability.
Mounting the Wheels and Tires
The wheels carry the entire burden of your electric bicycle assembly, and their mounting demands more than blind torque. I align the disc rotor between the caliper pads before the axle ever touches the dropouts. This small gesture prevents a bent rotor and a frustrating rub that plagues first time builders. The axle seats fully, then I snug the quick release or thru axle in measured increments.
Tire beads deserve equal attention during electric bicycle assembly. I inflate to 20 psi first, then work the bead around the rim to check for pinching. A sudden pop at 50 psi signals a trapped tube.
For every wheel I mount:
- Spin the wheel and listen for rotor contact.
- Check the tire for a consistent bead line.
- Torque the thru axle to the manufacturer’s specification.
The wheels now spin freely on their bearings, and the frame sits level on the ground!
Fitting the Saddle and Seatpost
Ah, the saddle. This is where the electric bicycle assembly process becomes deeply personal. A saddle set too high invites a symphony of knee complaints, while one tilted forward creates an endless, unseemly slide towards the handlebars. I prefer to set the seatpost height first, using a simple rule: place your heel on the pedal at its lowest point. Your leg should be perfectly straight. That is your starting mark, and it is a far more reliable metric than vanity.
The seatpost collar deserves a gentle hand. I tighten it in small, measured turns, checking for any play while the bike is stationary. This is not a place for brute force; a stripped clamp here means a trip to the hardware store. When you do find that sweet spot, the saddle angle should be level. A spirit level is a fine tool, but a discerning eye works wonders.
– Level the saddle using the nose as a reference point.
– Ensure the seatpost is inserted past the minimum insertion line.
– Apply a thin layer of grease to the post if the frame is alloy.
I always give the saddle a firm wiggle after tightening. Any movement suggests a looser ride ahead. This element of the electric bicycle assembly is about a quiet, confident connection to the machine. When the saddle is perfectly aligned, the ride itself feels balanced, and that is a subtle luxury worth pursuing.
Aligning Brakes and Shifters
Brakes and shifters demand honesty. The cables arrive coiled like dormant serpents. I route them through their guides with deliberate care. For the brakes, I align the caliper so the rotor runs true, then squeeze the lever several times to seat the pads. The shifters require a different touch. Each click should correspond with a clean gear change.
Here are three checks before tightening the anchor bolts:
- Verify the cable is seated in the barrel adjuster.
- Pull the outer housing firmly into its stops.
- Turn the cranks while shifting through each gear.
A misaligned derailleur turns every climb into a conversation with entropy. When the electric bicycle assembly concludes, the drivetrain should whisper, not shout.
Connecting the Electrical System
Understanding the Wiring Harness
Nearly 40% of eBike faults trace back to a loose connection, and most of those happen during electric bicycle assembly. Treat the wiring harness as a set of matched plugs, not decorative tinsel. Each connector is keyed. Align the flats and push until the latch engages. Colour coding helps, but do not rely on it. Many wires feel the same through thick gloves.
Route the harness away from rotating parts and sharp edges. The frame’s interior can chafe a cable quickly over gravel roads. Zip ties are cheap. Shorten them after routing.
Common failure points:
– The charger port connection under the down tube
– The brake sensor wires near the levers
– The display cable behind the stem
Tuck the battery wire into the channel before tightening any brackets. Tension will separate the plug over time. This choice decides whether your electric bicycle assembly ends with a proud test ride or a baffling diagnostic session.
Connecting the Controller and Display
Connecting the controller and display is where electric bicycle assembly turns from mechanical chore into electronic courtship. The controller, a metal box full of neuroses, demands correct voltage. The display, your only window into its moods, expects a clean handshake. Plug them before mounting the battery. Loose connectors here cause ghost errors that mimic a dead motor.
Mount the controller where it breathes, not where it bakes. Plastic ties work better than metal clamps. Heat is the silent killer of cheap units. Some controllers loop their own cables back over the case. Avoid that tangle.
- Match the positive pin first
- Listen for the latch click
- Route the display cable clear of the stem
Most riders screw up the direction of the display connector. It only seats one way. Force means you are fighting the keyed shape. South African potholes will punish a half seated plug. Take the extra minute to zip tie the cable slack near the head tube.
Routing Cables Cleanly
Most electrical faults on an e-bike trace back to a cable that was routed poorly, not a component that failed. Cable routing is where electric bicycle assembly shows its quality. A loose wire will chafe against the frame, wear through its sheath, and short out after a few trips over potholed Johannesburg streets!
Run the cables along the downtube and secure them with frame clips. Leave slack at the head tube so the handlebars can turn fully without stressing the connectors. Zip ties work well, but do not cinch them so tight that they crush the wires. I have watched riders skip this step and pay for it later.
- Keep cables clear of the brake rotors
- Use spiral wrap where cables pass the bottom bracket
- Check for pinching at the stem before final tightening
Clean routing saves hours of fault finding later. It is a simple discipline that separates a reliable build from a troublesome one. This stage of electric bicycle assembly deserves the same patience as the mechanical parts.
Installing Throttle and Pedal Assist Sensors
Connecting the electrical system rewards a calm hand. The throttle and pedal assist sensors are the parts that read your every move. The pedal sensor sits near the crank and wants a specific gap. Too tight and it grinds. Too loose and it sends ghost signals. The throttle is more forgiving, but a loose connector can cut power at the worst moment. I once watched a rider wire it backward and then wonder why the bike launched in reverse.
A clean electric bicycle assembly depends on these connections. Test the sensor gap and plug in the throttle with the battery off. Listen for the click. Give the cables a gentle tug. Then secure them with a wrap.
- Align the pedal sensor disc with the magnet.
- Check the gap with a business card.
- Fasten the throttle clamp without crushing the housing.
Now the system knows when you pedal and when you twist. That is the point where the machine becomes your accomplice.
Powering Up with Battery and Motor
Securing the Battery Mount
With the wiring tucked away, the battery mount now demands your attention. This is the moment where electric bicycle assembly turns from parts into performance. A loose mount means your ride ends with a lithium brick bouncing down the road.
Secure the cradle first. Most frames use bolts or a sliding rail. Torque them to spec, not to the sound of cracking alloy. Attach the battery, then test the latch. It should click with authority.
- Verify the locking key rotates smoothly.
- Check for wobble by pushing the battery sideways.
- Confirm the charge port sits clear of the frame.
Finally, plug in the motor cable and listen for the controller’s confirming beep. That sound means your electric bicycle assembly has succeeded.
Attaching the Hub or Mid-Drive Motor
A motor that spins freely on the workbench can still fail on the road if you skip torque checks. Your electric bicycle assembly progresses when the motor joins the frame. A hub motor slots into the rear dropouts, while a mid-drive unit bolts near the bottom bracket. Each demands precise torque.
I always tighten in a star pattern. That prevents uneven stress on the motor casing. For hub motors, align the torque arm properly. For mid-drives, verify the chainline before locking everything down. Run a final inspection:
- Confirm the motor spins freely.
- Check for cable pinch points.
- Test the throttle response.
Once attached, connect the phase wires and Hall sensor cables. Match the colors. Then power up the battery. The controller should respond with a soft hum. That hum is your reward. Every quiet click confirms the motor is properly seated.
Making Electrical Connections
The battery rests in its cradle, heavy with stored energy. I connect the leads with deliberate care. The phase wires wait, bundled and still. Electric bicycle assembly reaches the moment of ignition. Each connection clicks with finality.
I check the voltage meter. Then I turn the master switch. The controller emits a low hum. That hum travels through the aluminum frame. The motor shudders once, then steadies into silence.
- Confirm the battery voltage matches the controller.
- Verify the positive and negative leads are secure.
- Listen for the click of the relay engaging.
Current flows. The display glows. Your machine wakes!
Testing the Power Flow
A voltage reading that lies is more dangerous than no voltage at all. During electric bicycle assembly, the moment after power-on reveals whether every connection earned its place. I check the battery meter first, then the display. Both must agree before I trust the ride.
The controller hums. The motor waits. Testing the power flow requires methodical attention. A quick sequence works best:
1. Measure the battery voltage at the cradle.
2. Engage the throttle and feel for the motor’s kick.
3. Cycle the pedal assist and watch for a smooth response.
Each test confirms the circuit lives. The display glows steady. The motor shudders and settles. This is the moment assembly ends and trust begins.
Adding a Battery Lock or Safety Strap
Sliding the battery into its cradle is the last physical step in electric bicycle assembly. The connection clicks, but a click alone is not security. Every battery needs a lock or safety strap. South African roads demand this attention. A loose battery loses contact on the first pothole, and the motor cuts out mid-pedal.
Choose a lock that matches your frame. Some batteries use keyed locks, others use rubber straps. Test the fit before you close everything up.
- Check the lock engages fully.
- Pull the battery to confirm it holds.
- Route the strap clear of moving parts.
With the battery secured, power flows to the motor. The display lights, the controller hums, and the wheels wait for your first push. The process of electric bicycle assembly rewards patience, and this moment shows why.
Charging and First Power-On
The first power on is the moment electric bicycle assembly proves itself. Give the battery its initial charge first. Most lithium packs arrive near 30%. Plug the charger into the wall, then the battery, to prevent sparking. Wait for the indicator to turn green, which can take four hours. Resist test riding early!
Insert the charged battery and press the display power button. Watch for the startup sequence and listen for the controller’s hum. No error codes means the system is ready.
- Check the battery percentage against the charger readout.
- Pedal to confirm the sensor wakes the motor.
- Apply the brakes to verify the motor cuts off.
These checks prevent common failures such as reversed connections.
Fine-Tuning and Quality Assurance
Adjusting Derailleurs and Brake Tension
Fine-tuning a derailleur is where patience meets precision. A single quarter turn of the barrel adjuster can mean the difference between crisp shifts and a chain that hesitates. For brake tension, the goal is equal pull on both sides. Squeeze the lever firmly, then release. Watch the caliper arms. They should move in unison, not wobble.
Here is a quick sequence to verify your work:
1. Check that the derailleur aligns with the largest cassette cog.
2. Confirm the cable has no slack when the shifter clicks.
3. Test brake lever throw until it stops two finger widths from the grip.
These steps matter because electric bicycle assembly demands components that respond instantly. Any hesitation affects safety. The whole process feels like tuning an instrument, where every screw holds a note.
Checking Torque Specifications
Torque specifications define the exact force for each fastener. A loose motor mount on a South African trail becomes a rattle, then a failure. Electric bicycle assembly demands that every bolt receives its newton meter value. The torque wrench is your verification tool during fine tuning.
Critical fasteners deserve a second check:
- Motor mounting bolts, because vibration seeks out weakness.
- Brake rotor bolts, where a loose fastener ruins stopping power.
- Stem faceplate bolts, which control steering precision.
Quality assurance means testing after tightening. The frame creaks under load, and you listen. A bolt perfect at 25 Nm may settle after a short ride. Rechecking torque is the final act of electric bicycle assembly that separates a safe machine from a failure point.
Performing a Test Ride
After the final torque pass, the bicycle waits! A test ride is the only honest way to verify electric bicycle assembly. I roll the machine into open air, twist the throttle, and listen. The drivetrain should hum, not chatter. The suspension should absorb gravel, not rattle your teeth.
Vibrations carry information. A click from the bottom bracket means the motor mount needs attention. A wobble at speed suggests the headset is loose. I brake hard at a deserted Cape Town intersection. The rotors bite cleanly. The steering holds its line.
I check the following during the ride:
– Acceleration response without hesitation
– Brake lever feel at low and high speed
– Display readings for voltage and assist level
– Chain tension over uneven tar
Back at the stand, I recheck each fastener. This final pass completes the electric bicycle assembly. The road will verify the rest.
Troubleshooting Common Setup Issues
Fine tuning begins when the first ride ends. I return to the bench with fresh feedback. The electric bicycle assembly may appear complete, but small faults surface under load. A hesitation at the pedal assist sensor often means a millimetre gap too wide. I adjust the magnet ring. A clicking under throttle could be the torque arm shifting. I tighten it and recheck the axle nut. Quality assurance is about listening to the machine.
Common setup issues I encounter repeatedly:
- Spoke pinging from the rear wheel under hard acceleration. I true the wheel and re-tension spokes.
- Display flickering after a bump. I inspect connector pins for corrosion and reseat them.
- A soft motor cutout at high speed. I look for a pinched cable in the wiring harness.
Each fix changes the character of the ride. I repeat the process until the electric bicycle assembly responds predictably.
Maintenance Tips for Longevity
Longevity in electric bicycle assembly comes from treating maintenance as a ritual, not a repair. After each ride, I wipe the drivetrain and inspect the torque arms for hairline movement. A loose motor bracket bolt announces itself with a metallic knock at low speed. I check the battery contacts for scorch marks, then apply dielectric grease. The display mount develops play on gravel roads. I shim it with a thin rubber washer.
I also test the brake cut-offs at a standstill. A faulty switch can scramble controller logic and shorten motor life. The pedal assist sensor needs a clean ring free of magnetic debris. I recheck the axle nuts once a month. This attention turns electric bicycle assembly into a dependable habit.